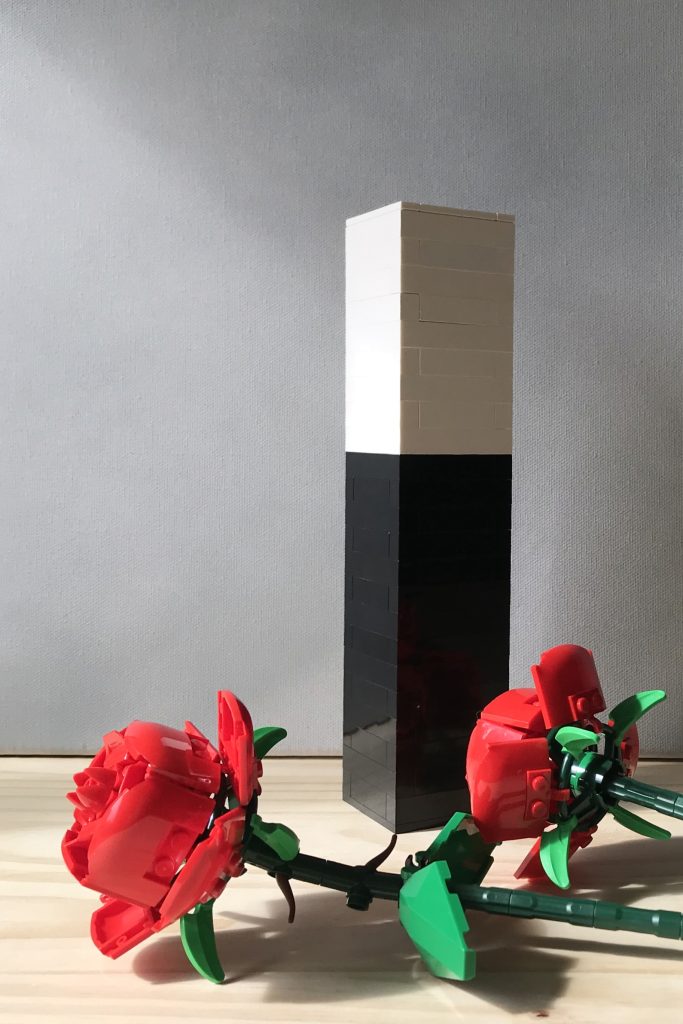
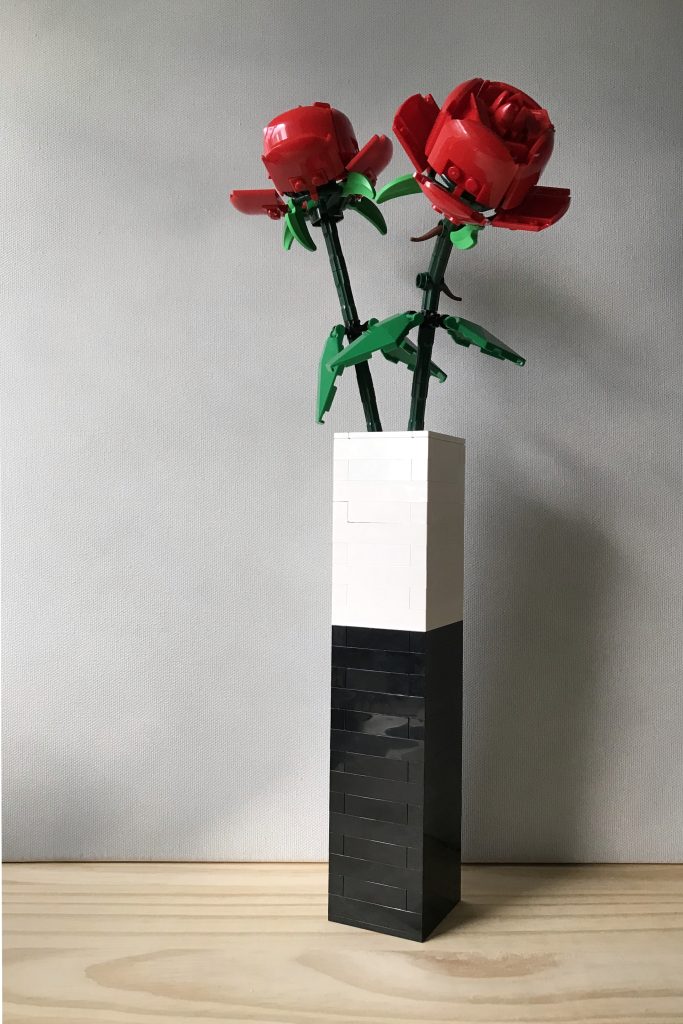
I loved building LEGO’s Roses (40460) set! Since they don’t come with a vase, here are some simple beginner-level instructions to build your own easy brick-built colorblock bud vase. It’s a great way to display your Roses, and would be a fun special gift to give with the Roses set.
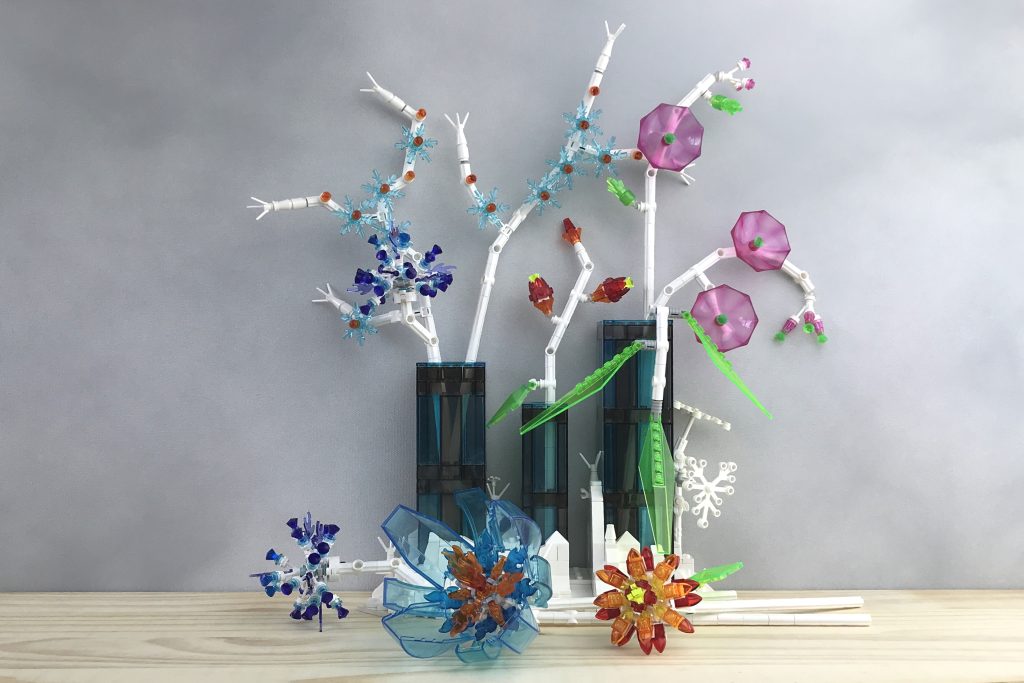
And if you’re new to LEGO or coming back to LEGO as an adult, like me, this is a great beginner-level skill building DIY project if you enjoy the botanical display sets.
(Advanced builders: this is designed as an extra-easy beginner project. If it’s too simple for you, you might enjoy my other MOCs more.)
Here’s what you’ll need:
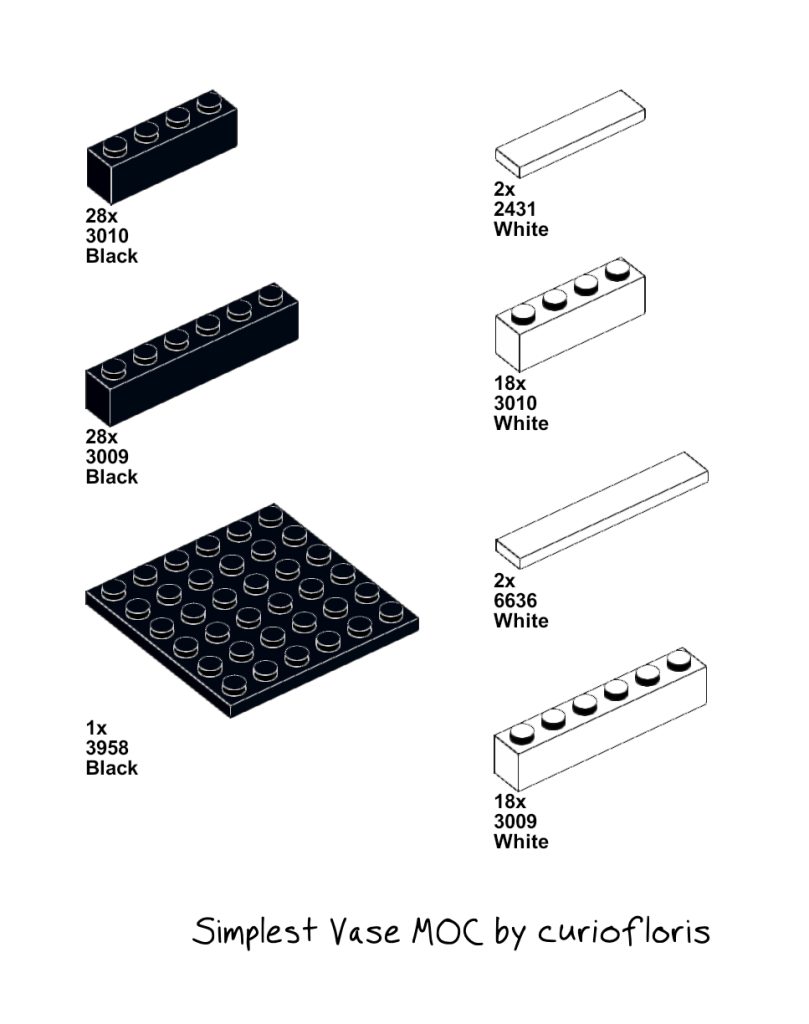
Don’t have these bricks? Try LEGO’s Pick a Brick (that’s the US store version), or buy from sellers on Brick Owl or BrickLink. (If you haven’t ordered from Pick a Brick before, please note that receiving bricks in the US from Denmark can take 6 weeks or longer.)
Read on for step-by-step instructions, or see the visual instructions here.
Begin with the bottom.
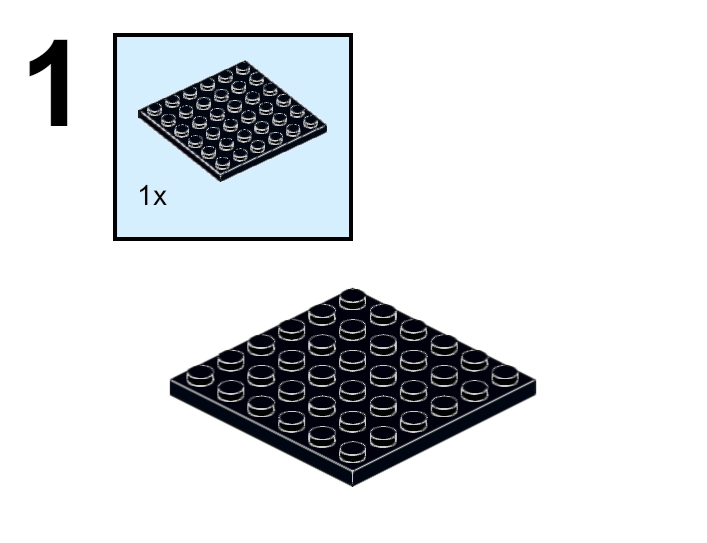
1. Put your black 6 x 6 plate on a desk, table, or other firm, stable surface, with the studs up. (It’s usually easiest to build where you can push the bricks down into place, instead of holding both pieces in your hands.)
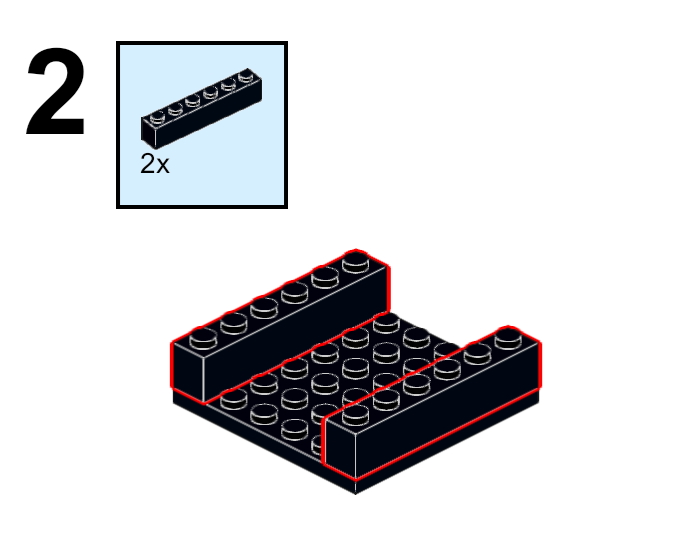
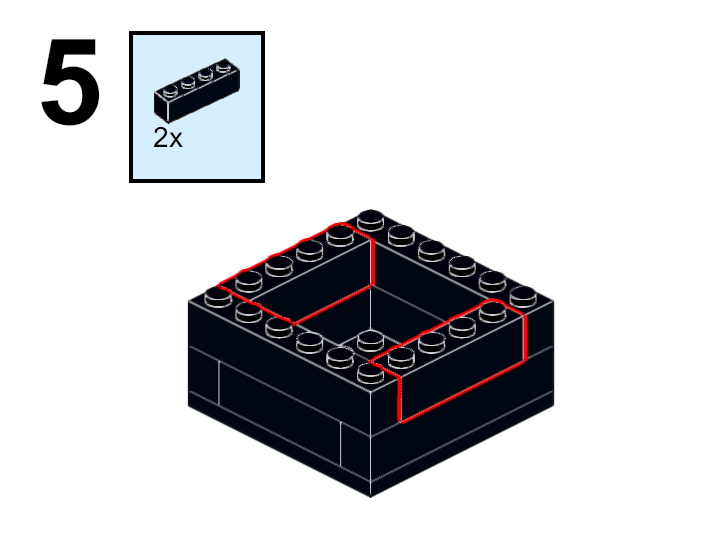
2. Place one black 1 x 6 brick along one edge of the black 6 x 6 plate. Press it down firmly over the bumps (these are called studs). The brick should cover all six studs on the plate edge, and should line up with three sides of the plate, with nothing sticking out. Place a second black 1 x 6 brick along the opposite edge.
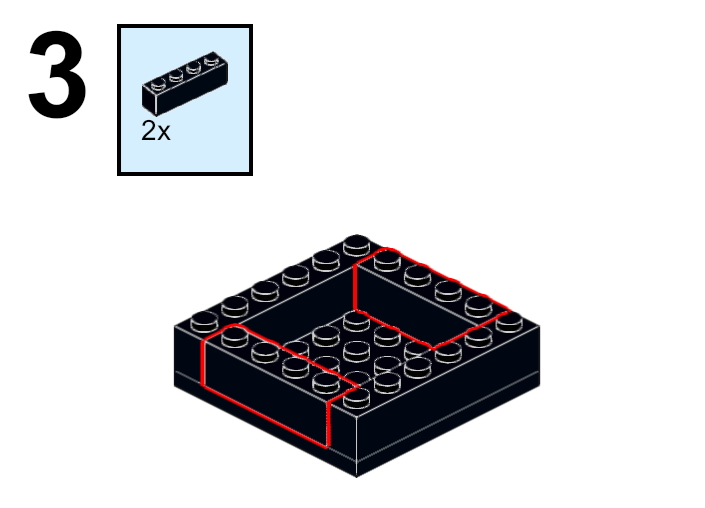
3. Place one black 1 x 4 brick along the edge in between the two 1 x 6 bricks. Place a second black 1 x 4 brick along the opposite edge.
Now, we’ll alternate overlapping layers for strength.
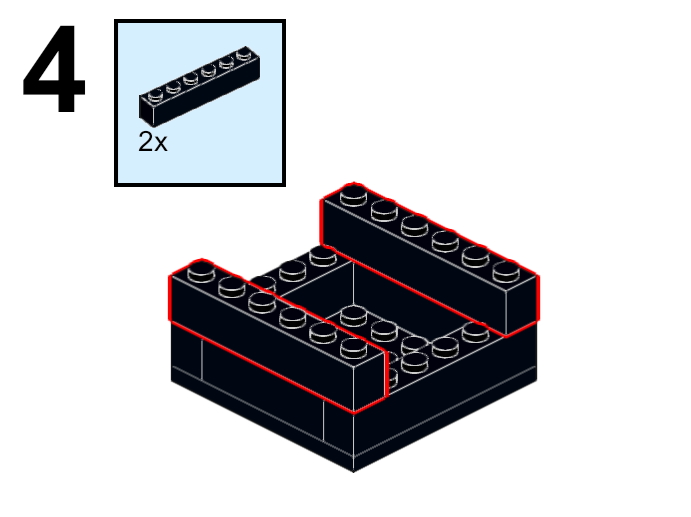
4. Place one black 1 x 6 brick along one edge of the build so that it covers the 1 x 4 brick and one stud each of the two 1 x 6 bricks on the previous layer. Place another black 1 x 6 brick along the opposite edge of the build, again covering the 1 x 4 brick and one stud each of the two 1 x 6 bricks from the previous layer.
5. Place one black 1 x 4 brick along the edge in between the two 1 x 6 bricks. Place another black 1 x 4 brick along the opposite edge.
Building this way has more structural integrity than stacking the same bricks all the way up the sides.
Continue, Repeating the same pattern.
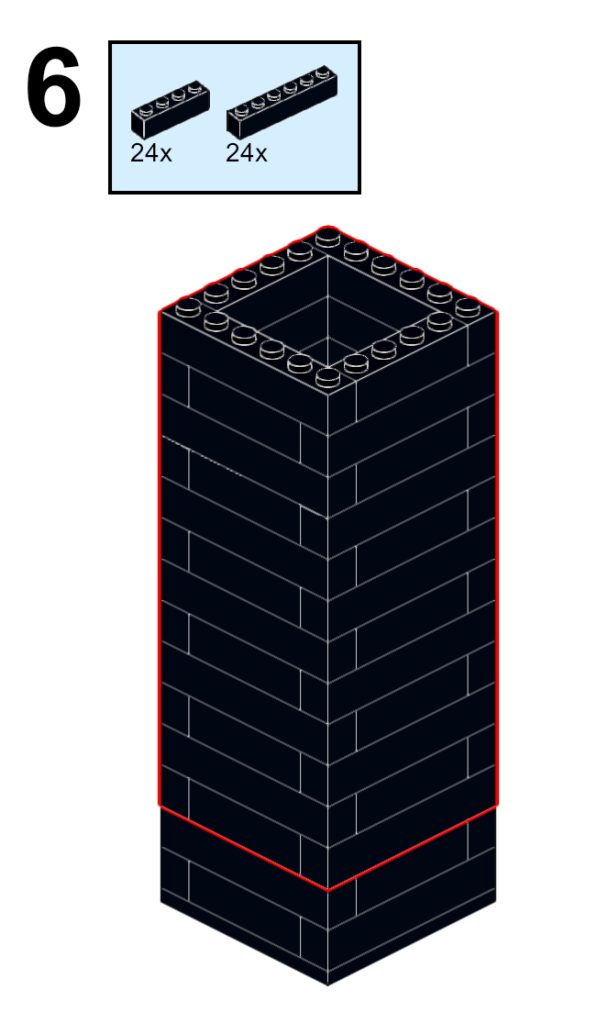
6. Continue building these alternating layers until you’ve used up all your black bricks. You should have fourteen layers of black bricks total.
Switch colors to white.
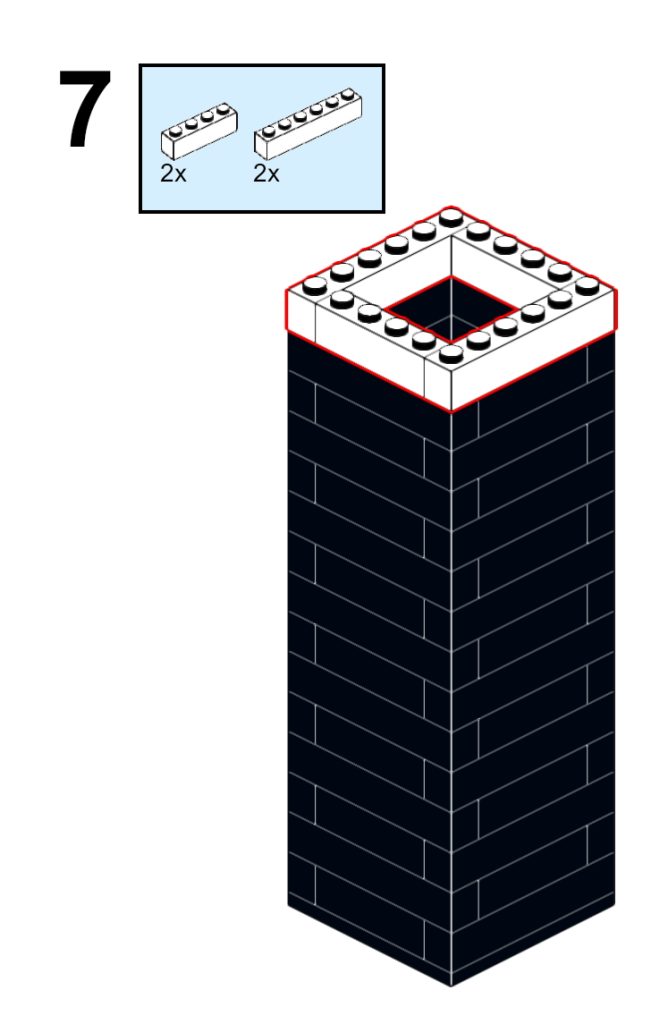
7. Using the same alternating pattern, build the next layer using your white 1 x 6 bricks and white 1 x 4 bricks.
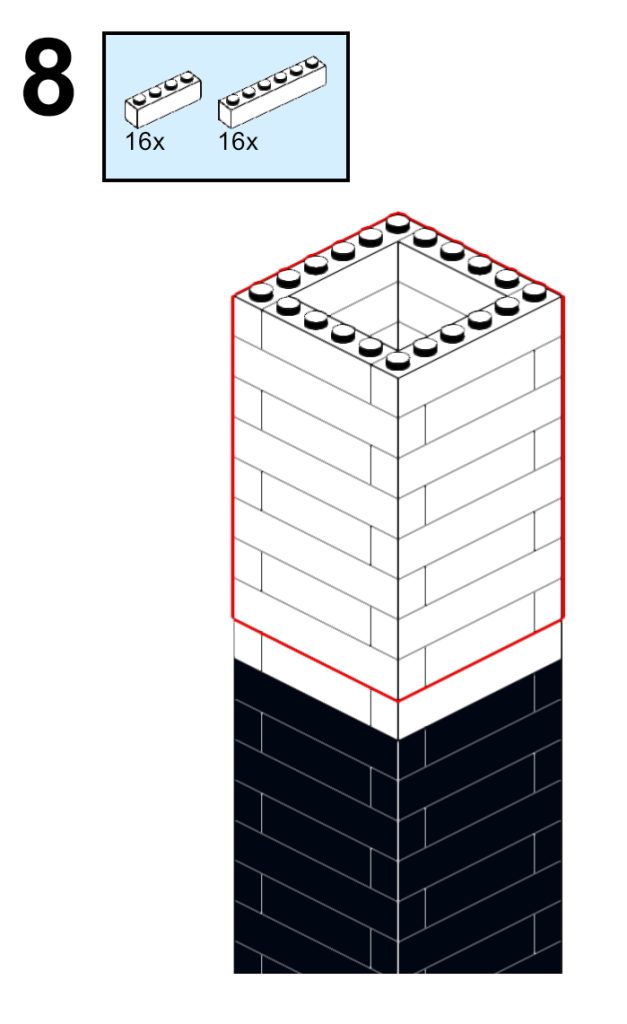
8. Continue building in white alternating layers until you’ve used up all your white bricks. You should have nine layers of white bricks total.
Add tiles to finish.
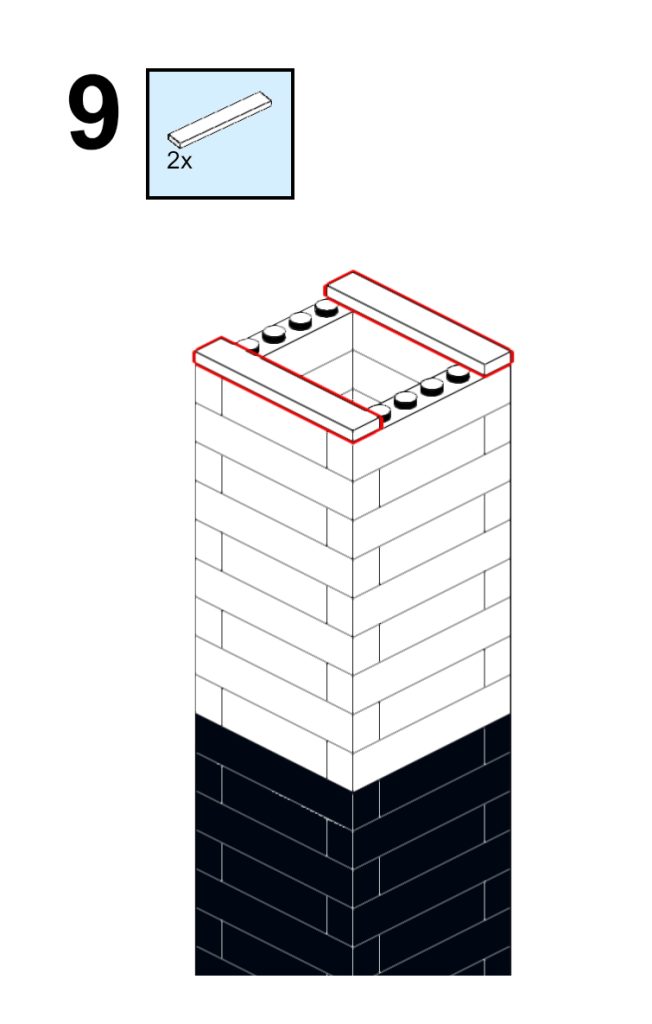
9. Add the two white 1 x 6 tiles to the top of the vase, so that it covers the 1 x 4 brick and one stud each of the two 1 x 6 bricks on the previous layer, continuing the same alternating pattern.
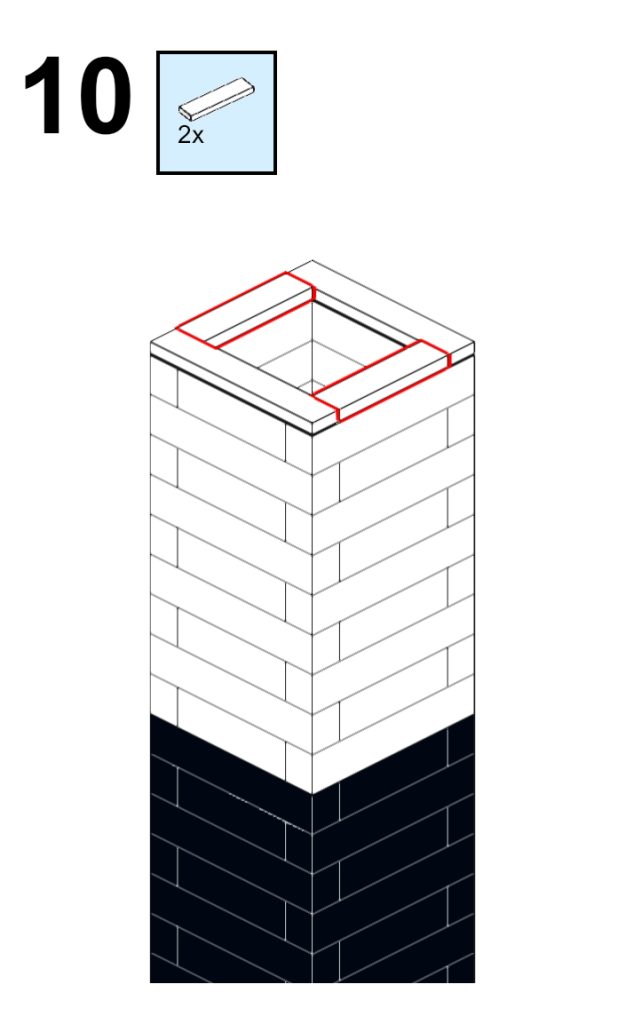
10. Add the two white 1 x 4 tiles to the top of the vase in between the two 1 x 6 tiles.
Tiles aren’t necessary, but they make the top of the vase look more polished and smooth.
Just add LEGO Roses

Build and add your Roses, and congratulate yourself — you built your own vase!
Optional: Make it fit your own style
Here are a few quick variations you could try:
- Choose your own two colors (or more!)
- Change the size (just remember to change the brick size to match the base plate)
- Alternate stripes instead of colorblocking (you could even add thin stripes with 1 x 6 and 1 x 4 plates instead of bricks)
- Add different LEGO flowers
- Build two or more different vases in different heights, one per flower